
Learning how to waterproof garden shed timber properly is not just about putting on a fresh coat of treatment and hoping the weather behaves itself. A shed needs to keep rain out, but it also needs enough airflow to let trapped moisture escape.
Welsh weather can be hard on garden buildings. Rain can blow under roof edges, soak into untreated timber, sit around the base and find its way through tired seals. Once damp stays inside, you may notice swelling boards, mould, rusty tools, soft timber or that familiar musty shed smell.
At Eden Landscapes, we believe a garden shed should be practical as well as good-looking. It should protect your tools, furniture and garden kit, while sitting neatly within the garden. Good shed maintenance works best when you look at the whole shed, not just the walls.
Why do garden sheds become damp in wet weather
Most shed damp problems begin in predictable places. The roof felt starts to lift. Timber treatment wears thin. Sealant fails around windows. Water gathers near the base. Inside, condensation builds when damp air has nowhere to go.
The Met Office’s UK climate summaries give useful context on rainfall, temperature and seasonal patterns. For shed owners, the practical lesson is simple: outdoor timber needs protection, drainage and ventilation.
A shed can become damp from outside rain and inside condensation. That is why waterproofing should not mean sealing every gap. The shed needs to resist rain while still allowing moisture to move away.
Before you start: garden shed waterproofing checklist
Before applying any product, inspect the shed properly. A quick check helps you avoid treating over a hidden leak.
| Area | What to check | What to do |
| Roof | Split felt, loose edges, moss or sagging | Repair or replace damaged covering |
| Walls | Peeling treatment, cracks or green staining | Clean, dry, sand and retreat |
| Base | Standing water or soil against timber | Improve drainage and airflow |
| Windows | Failed sealant or loose panes | Reseal with exterior-grade sealant |
| Door | Swelling, gaps or exposed end grain | Adjust, seal and retreat |
| Interior | Condensation, mould or rusty tools | Improve ventilation and storage |
| Gutters | Leaves, moss or overflowing water | Clear and maintain regularly |
Our guide to shed maintenance before the winter months is useful if you want a seasonal routine for spotting problems early.
How to waterproof a garden shed step by step
Step 1: Check where water is getting in
Walk around the shed slowly, then check inside with the door closed. If possible, inspect it after heavy rain. Damp patches, darkened boards and drips are easier to trace when the weather has just done its worst. Rude, but useful.
Pay close attention to the roof, corners, lower wall boards, window frames and door threshold. These are the usual weak points.
Inside the shed, look for:
- Damp patches on the floor
- Watermarks on walls
- Rusty tools or fixings
- Mould on stored items
- Soft timber near the base
- Musty smells after wet weather
Do not apply treatment until you understand the problem. A fresh coating will not fix failed roof felt, poor drainage or a leaking window.
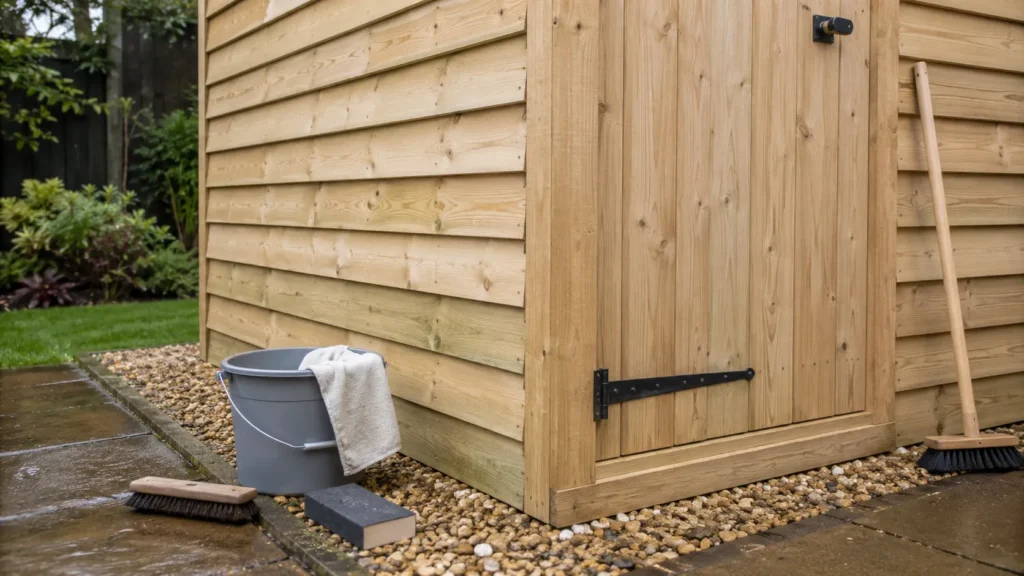
Step 2: Clean the shed and let the timber dry
Exterior timber treatment needs a clean, dry surface. If you apply it over algae, dirt, flaking paint or damp timber, it may not bond properly.
Brush off loose debris, cobwebs and mud. Wash away green staining with a suitable exterior cleaner, then let the shed dry fully. Choose a dry spell if you can, and avoid treating the timber if rain is due before the product has cured.
Sand back peeling coatings or rough patches. Focus on lower boards, exposed corners, door edges, window frames and cut ends. These areas often absorb moisture faster than broad wall sections.
Step 3: Repair the roof, joints and damaged timber
The roof is the shed’s first line of defence. If it fails, the rest of the shed quickly suffers.
Check felt, shingles or roof sheets for splits, wrinkles, lifted edges and loose fixings. If felt has become brittle or badly torn, small patches may only delay the problem. Replacing the roof covering may be more sensible.
Also check trims, panel joints and corners. Small gaps can let in wind-driven rain. Replace rotten timber where needed rather than coating over it. If timber is soft, crumbling or badly swollen, treatment alone will not restore it.
Clear moss, leaves and twigs from the roof. Wet debris holds moisture against the surface and slows drying.
Step 4: Apply a suitable exterior timber treatment
Once the shed is clean, dry and repaired, apply a suitable exterior timber treatment. The Wood Protection Association explains that preservative treatments for timber can help protect wood from decay and insect attack, with the right approach depending on how and where the timber is used.
For a shed, check that the product is suitable for exterior timber. Follow the instructions on preparation, number of coats, drying time and weather conditions. Do not stretch coverage too far. A rushed coat is a false economy with a brush attached.
Give extra attention to:
- End grain on boards, trims and doors
- Bottom boards close to the ground
- Corners and panel joints
- Window and door frames
- Roof trims and exposed edges
- Any freshly cut or repaired timber
If you are refreshing exterior shed timber, our Barrettine wood protective treatment page is a relevant place to check product details before planning the job. Review the available information, choose a suitable finish and follow the product guidance carefully.
Step 5: Seal doors, windows and exposed edges
Doors and windows are common leak points. Sealant hardens, frames move slightly and small gaps appear over time.
Check that window panes are secure and that sealant is still flexible. Remove failed sealant and replace it with a suitable exterior-grade product. Around doors, inspect the threshold, hinges and bottom edge. These areas often catch rain splashes and need careful treatment.
Do not forget the exposed end grain. Timber absorbs moisture readily through cut ends, so door edges, trims and repaired boards deserve extra attention.
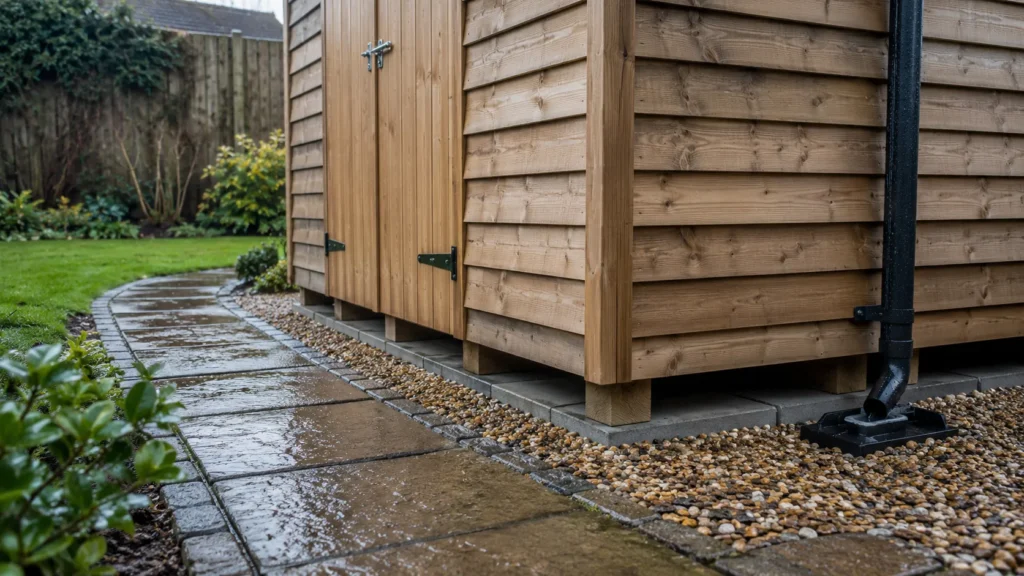
Step 6: Keep water away from the base
A well-treated shed can still suffer if it sits in standing water.
The base should be firm, level and well-drained. A shed should not sit directly on soil or grass, as this can hold moisture against the floor and lower boards. A suitable base helps support the structure, improves airflow beneath the shed and reduces contact with damp ground.
Depending on the shed and garden, suitable bases may include paving slabs, concrete, timber bearers or a purpose-built base. The right choice depends on the shed size, ground conditions and how the building will be used.
If you are replacing an old shed, our range of garden sheds can help you compare styles before thinking through the base, access and surrounding area.
Step 7: Improve ventilation to reduce condensation
Waterproofing is not only about blocking rain. It is also about allowing trapped moisture to escape.
Condensation can build up when a shed is packed tightly with damp tools, wet garden furniture, soil bags, machinery or firewood. If air cannot move, moisture lingers.
Good habits include:
- Keeping vents clear
- Leaving space behind the shelving
- Raising boxes and tools off the floor
- Avoiding wet items against timber walls
- Opening the door on dry days when practical
- Not overfilling the shed
If you use the shed for hobbies, potting or light DIY, our guide on how to insulate a garden shed explains what to consider before improving the inside of the building.
Common shed waterproofing mistakes to avoid
Some shortcuts can make damp problems worse. Try to avoid:
- Treating timber while it is still damp.
- Using interior paint on exterior shed walls.
- Blocking vents to stop rain from getting in.
- Letting soil, gravel or plants sit against boards.
- Ignoring the damaged roof felt while treating the walls.
- Storing wet tools directly against timber.
- Forgetting the underside, corners and lower edges.
- Waiting until winter storms arrive before checking anything.
The best approach is steady maintenance: inspect, clean, dry, repair, treat and ventilate.
How often should you waterproof a garden shed?
There is no fixed timetable for every shed. Exposure, shade, roof condition, timber type, treatment choice and airflow all make a difference.
TRADA/CIS guidance on finishes for external timber highlights the importance of suitable finishes, correct preparation and maintenance for timber used outdoors.
As a practical routine, check your shed at least twice a year: once before the wettest months and once after winter. If water no longer beads on treated timber, the colour has faded badly or damp marks are appearing inside, it may be time to retreat or repair.
In summary
The best way to waterproof a garden shed is to treat it as a whole structure. Look at the roof, walls, base, doors, windows, joints and ventilation together. A fresh coat of treatment helps, but it cannot fix standing water, failed felt or poor airflow on its own.
Start with a careful inspection. Clean and dry the timber. Repair weak points. Apply a suitable exterior treatment. Keep the roof clear, improve drainage around the base and make sure moisture can escape from inside.
With regular care, your shed has a much better chance of standing up to Welsh weather and staying useful through the wetter months. A little maintenance now is far better than discovering in spring that your tools have quietly become part of an indoor water feature.